Providing OEM, Wholesale and Retail Services Worldwide. Toll Free : 1-800-717-5818 (U.S. )

How to use and read a digital depth gauge?
2. Preparation
3. Operation
4. Maintenance
5. Caution
1. About Depth Gauge
A depth gauge is a precision measuring instrument, designed specifically to measure the depth of holes, recesses, cavities and distances from a plane surface to a projection. In other word, a depth gauge is a variation of the ruler. The depth gauge consists of a ruler—usually a narrow one to measure the depth of holes, counter bores, etc. There is a base through which the ruler can slide up and down, and a locking screw on the cover to clamp the ruler in place. The base, which is machined flat and at right angles to the ruler, is placed on a reference surface and the ruler lowered into the hole or recess until its bottoms.
Depth gauges comes in various configurations, depending on the specific application. Depth gauge types include digital tire thread depth gauges, digital depth gauges, single hook type digital depth gauges, needle digital depth gauges, double hooks digital depth gauges, digital depth gauges with adjustable base, vernier depth gauges, and dial depth gauges. The digital version is capable to output measurements to a wide variety of peripherals and data collection devices. These simple, inexpensive tools are typically about 150mm long, and they can even measure up to longer range, such as 1000mm.
The following steps illustrate the correct way to use the digital depth gauge:
Step1: Clean the measuring surface of the item being measured with clean cloth (or soaked with cleaning oil);
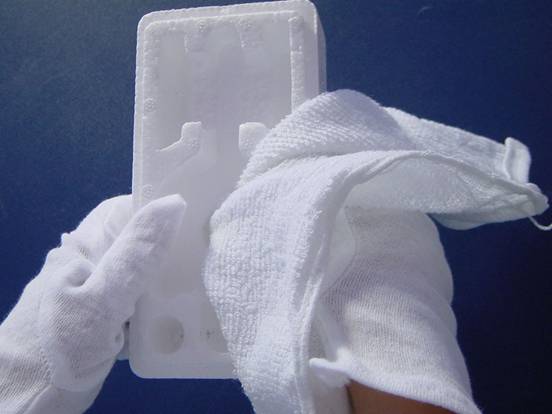
Step2: Clean the surface of the protective sticker with clean cloth (or soaked with cleaning oil); 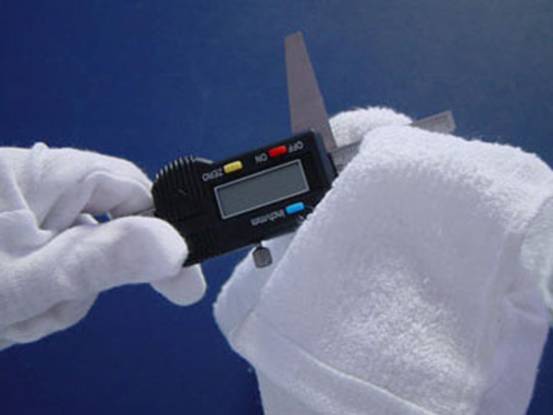
Step3: Clean the measuring faces of the depth gauge with clean cloth (or soaked with cleaning oil); 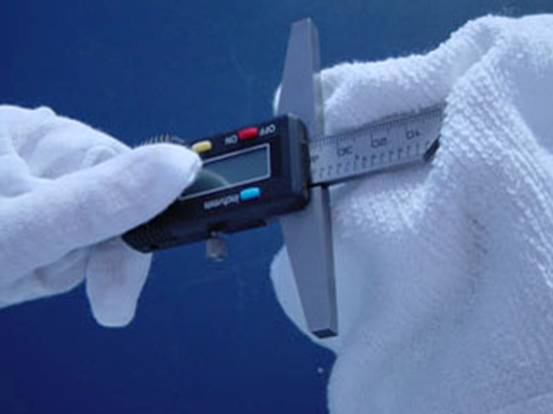
Step4: Loosen the locking screw of the digital depth gauge. 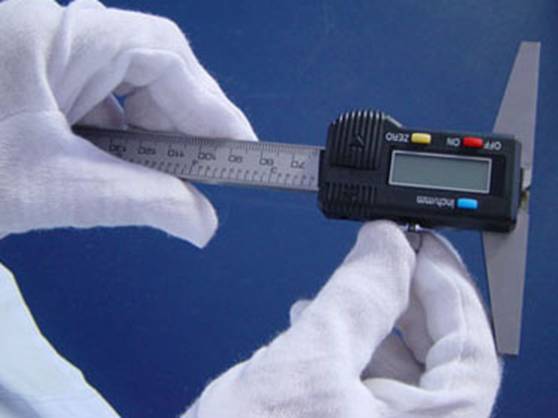
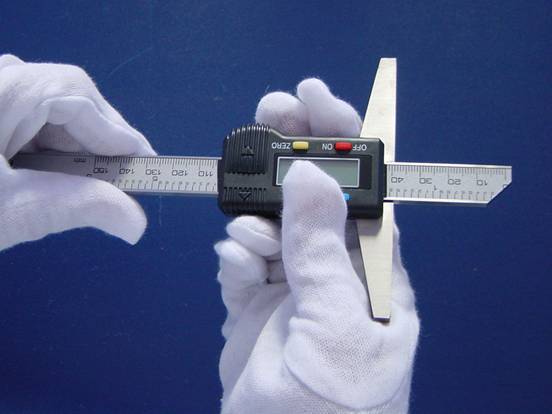
Step5: Move the slider backward and forward, check them to see if the display screen and all the buttons work properly.
3. Operation
Keep in mind avoid touching any of the measuring surfaces of both the subject being measured and the depth gauge with bare hands as it may cause inaccuracy due to the sweat on your hands (if you don’t wear the gloves while measuring). Keep them clean and dry all the times.
The diagrams below show how the depth gauge is used correctly:
Step1: Before measuring, press the ON/OFF button to switch on power.
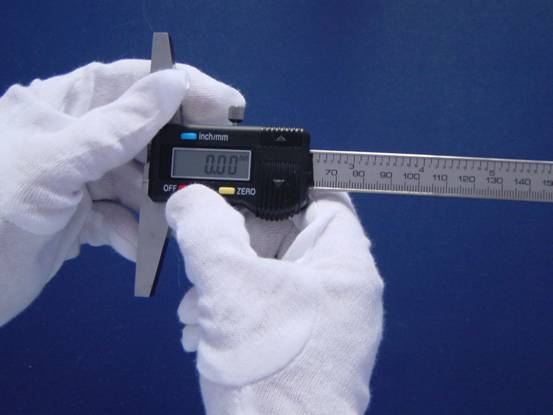
Step2: Press the MM/INCH button to select a unit system needed. (Here we choose the inch version.)
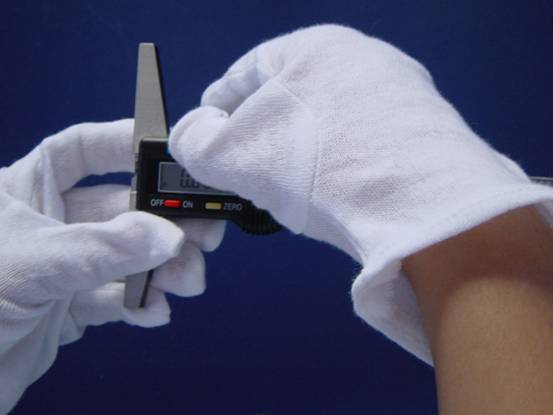
Step3: Press the ZERO buttons to set zero. 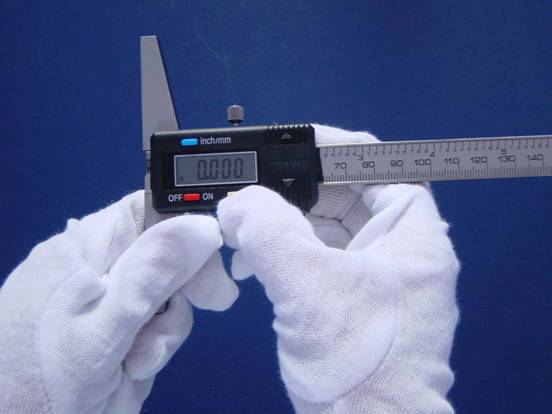
Step4: Push the ruler of the depth gauge all the way down until the measuring surface touches the bottom of the item being measured thoroughly. 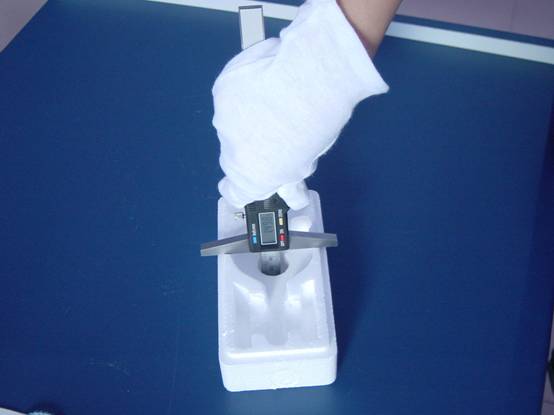
Step5: Tighten the clamping nut of the depth gauge. 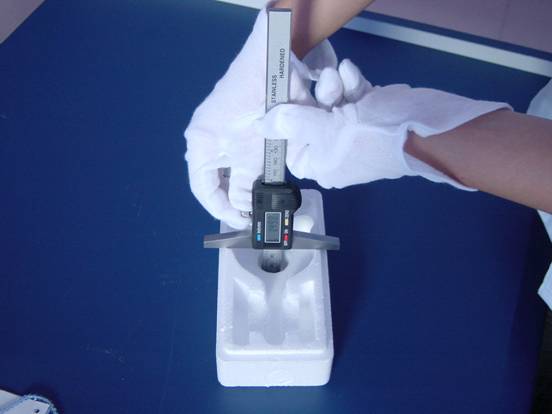
Step6: The tool is withdrawn and the reading taken directly from the large LCD display screen. As shown, the reading is 1.4985 inch. 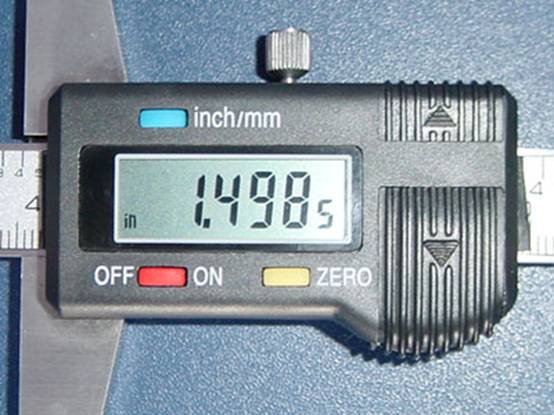
4. Maintenance
1) Turn off the depth gauge by pressing “ON/OFF�?button when the depth gauge is not in use. Take out the battery if the depth gauge will stay idle for a long time.
2)
Never apply voltage on any part of the depth gauge or engrave with an
electric pen as it might cause damages to the electronics.
1) All depth gauges should be calibrated at least once a year, depending on how frequent it is used. If a gauge had an impact, it should be tested before use. If a gauge is not calibrated, it can be checked against an accurately marked shot line.
2) When the display keeps flashing or does not appear, take off the battery cover as the arrow shows and replace the battery with a new one (SR44, 1.55V). Note that the positive pole of the battery must be facing out. If the battery bought from the market does not work properly, it might be power lost due to long shelf life.
Buy Digital Depth Gauges at TresnaInstrument.com Now!
